
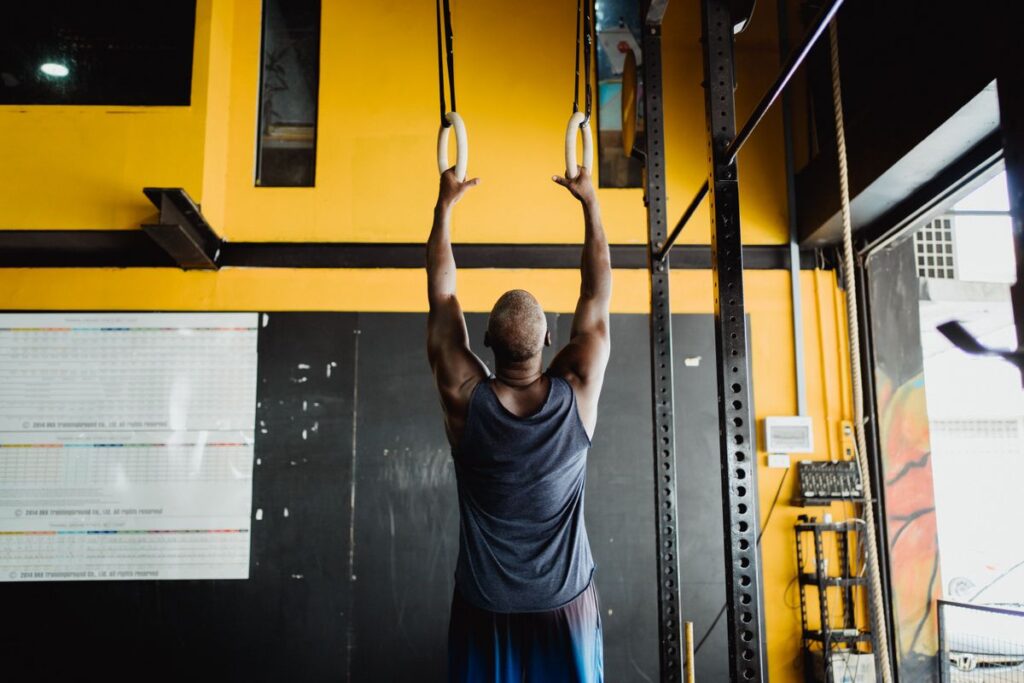
Have you ever walked into a gym, noticed someone hanging from a pull-up bar, and wondered what they were actually doing? It might look like they’re simply holding on and waiting, but this simple movement can challenge your grip, shoulders, forearms, and upper-body control. The dead hang exercise is one of the easiest movements to learn, yet beginners often underestimate how difficult it can be to hold their body weight for even 10 seconds. The good news? You don’t need to be an experienced athlete to start. With the right technique, a suitable bar, and gradual progress, you can build stronger hands, improve your hanging ability, and prepare your body for more advanced exercises.
What Is a Dead Hang?
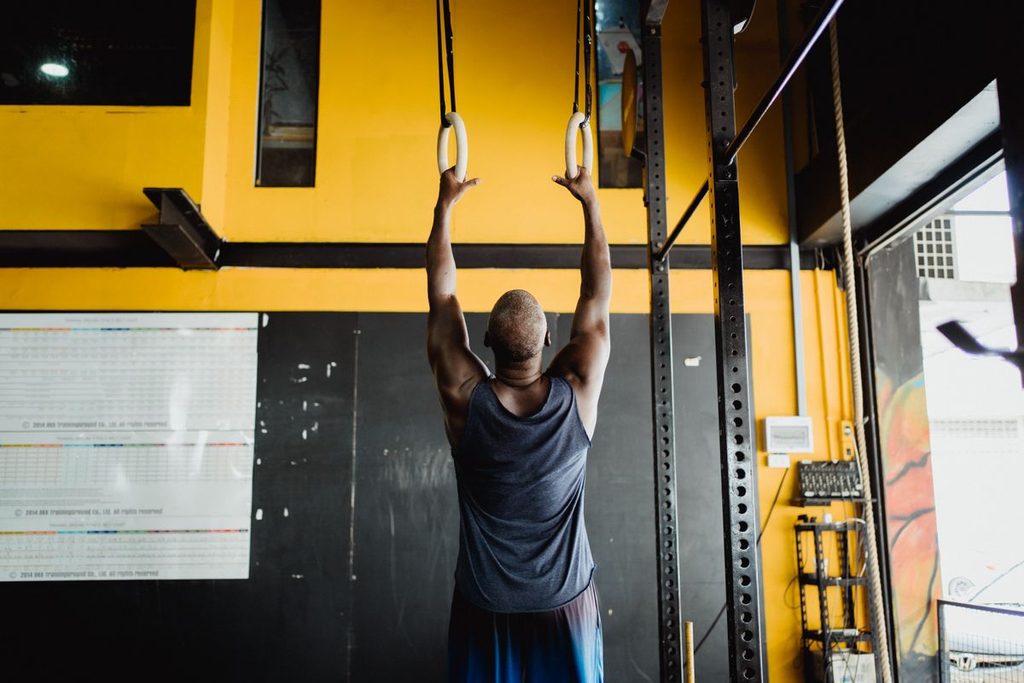
A dead hang is a bodyweight exercise in which you hold a stable overhead bar with both hands and allow your body to hang beneath it.
Your feet remain off the floor, your arms stay extended, and your hands support your body weight. Unlike pull-ups, you don’t pull yourself upward or repeatedly bend your elbows. The goal is to maintain a controlled hanging position for a specific amount of time.
It is sometimes called a passive hang because your body hangs relatively relaxed rather than actively pulling your shoulder blades downward.
However, there is more than one way to perform it.
Passive Dead Hang
In a passive hang, your elbows remain straight while your shoulders are allowed to rise naturally toward your ears.
Your body hangs underneath the bar without actively pulling your shoulder blades down. You should still maintain a secure grip and avoid completely losing control of your shoulders.
This variation is commonly used by beginners to get comfortable supporting their body weight.
Active Dead Hang
An active hang involves engaging your upper-back and shoulder muscles to create more control.
Instead of allowing your shoulders to rise fully, gently draw your shoulder blades downward while keeping your elbows straight.
You will notice your body rise slightly without performing a pull-up.
This variation requires more shoulder control and is useful for people preparing for pull-ups and other upper-body exercises.
Passive Hang vs. Active Hang
| Feature | Passive Hang | Active Hang |
|---|---|---|
| Arm position | Straight | Straight |
| Shoulder position | Naturally elevated | Actively controlled |
| Muscle engagement | Relatively relaxed | More upper-back engagement |
| Main focus | Hanging tolerance and grip | Shoulder control and strength |
| Difficulty | Usually easier | Usually harder |
| Suitable for | Beginners who tolerate hanging | People with basic hanging ability |
Neither variation is automatically better. They serve different purposes, and both can be included in a progressive training routine.
Dead Hang Exercise Benefits
This movement looks simple, but it can challenge several areas of your upper body. Its biggest practical advantage is that it allows you to train your grip and become more comfortable supporting your body weight without performing complicated movements.
Let’s look at the main benefits and what you can realistically expect.
1. Improves Grip Strength
One of the most noticeable dead hang benefits is improved grip endurance. For more insight into the relationship between grip strength, overall fitness, and dead hang training, see this ACE expert analysis of dead hangs and grip strength
When you hold a bar, your fingers, hands, and forearm muscles work to prevent your body from slipping. The longer you maintain a controlled hold, the longer those muscles must sustain the effort.
This can be useful in everyday activities and other gym exercises.
For example, stronger grip endurance may help you:
- Hold dumbbells during longer workout sets.
- Maintain your grip during barbell exercises.
- Perform more controlled pull-up and chin-up training.
- Carry grocery bags or other objects.
- Improve your confidence with hanging exercises.
Beginner tip: Don’t immediately chase a 60-second hold. Start with 5–10 seconds of comfortable hanging. Repeat a few short sets and gradually increase your total hanging time.
Remember, grip endurance is only one part of overall strength. Dead hangs should complement exercises such as rows, farmer’s carries, and other resistance movements.
2. Develops Shoulder Control and Overhead Tolerance
Your shoulders play an important role whenever your arms move above your head.
A controlled hang exposes your shoulders to an overhead position while your hands support your body weight. The active variation also challenges your ability to control your shoulder blades.
This can help develop:
- Awareness of shoulder positioning.
- Control during overhead movements.
- Strength endurance around the shoulder girdle.
- Confidence when preparing for pull-ups.
However, hanging is not a guaranteed treatment for shoulder pain or a cure for poor posture. Shoulder mobility and stability depend on several factors, including strength, joint function, and individual anatomy. The AAOS shoulder conditioning program provides additional exercises for developing shoulder strength, flexibility, and control.
If overhead positions cause pain, don’t force yourself into a full hang.
3. Builds Forearm Endurance
Your forearms do much more than make your arms look muscular.
They help control your fingers and wrists while performing activities that require holding, carrying, pulling, or gripping.
During a hang, the muscles responsible for maintaining your grip must work continuously. This makes the movement useful for developing muscular endurance in your forearms.
You might notice that your forearms become tired before your back or shoulders. That’s normal, particularly when you’re new to hanging exercises.
Try this:
- Hang for 5–10 seconds.
- Rest for 45–60 seconds.
- Repeat for 2–3 sets.
- Increase the duration only when your grip remains secure.
You can also combine hanging with farmer’s carries for more complete grip training.
4. Helps Prepare You for Your First Pull-Up
Can’t perform a single pull-up yet?
You’re not alone. Many beginners struggle because they haven’t developed enough grip endurance, upper-body strength, or familiarity with supporting their body weight.
A dead hang is a useful starting point because it introduces one of the basic positions used in pull-ups.
It helps you become comfortable with:
- Holding an overhead bar.
- Supporting your body weight.
- Maintaining a secure grip.
- Controlling your body without excessive swinging.
However, a longer hang doesn’t automatically mean you’ll be able to perform a pull-up.
Pull-ups require additional strength from your back, arms, and other muscles. You’ll need to practise movements such as assisted pull-ups, lat pulldowns, and controlled rows. If your bigger goal is developing overall strength and muscle, explore this muscle-building guide for skinny beginners for a complete approach to training, nutrition, and recovery.
A simple progression:
| Exercise | Purpose |
|---|---|
| Supported dead hang | Build initial hanging confidence |
| Regular dead hang | Improve grip endurance |
| Active hang | Develop shoulder control |
| Scapular pull-ups | Practise shoulder blade movement |
| Assisted pull-ups | Build pulling strength |
| Negative pull-ups | Develop control during lowering |
| Full pull-ups | Perform the complete movement |
5. Introduces Your Body to an Overhead Stretch
Many people spend hours sitting at desks, studying, driving, or using their phones.
This often means their shoulders spend much of the day in relatively limited positions.
A comfortable hang introduces an overhead position that may feel different from your usual daily movements.
Some people find this position provides a temporary feeling of stretching around their shoulders, upper back, and sides of their body.
However, don’t confuse a stretching sensation with proof that your spine is decompressing or that a structural problem is being corrected.
A dead hang cannot guarantee permanent posture improvements, increased height, or relief from back pain.
Use it as one small part of a balanced movement routine.
6. Challenges Your Core Stability
Your abdominal and trunk muscles may contribute to keeping your body from swinging while hanging.
This becomes more noticeable when you perform active hangs or deliberately maintain a controlled body position.
For example, imagine hanging from a bar while your legs keep moving forward and backward. Your body must constantly adjust to maintain balance.
A better approach is to keep your legs relaxed, your ribs controlled, and your body relatively still.
You can make the movement more challenging later by incorporating controlled knee raises, but these are separate exercises rather than part of a basic dead hang.
7. Provides a Simple Exercise With Minimal Equipment
Not everyone has access to a fully equipped gym.
One useful feature of hanging exercises is that they require relatively little equipment: a properly installed pull-up bar that can safely support your body weight.
You don’t need expensive supplements, machines, or complicated workout programs.
You can include short hanging sets in an upper-body workout or use them as part of a progressive grip-training routine.
Just make sure the bar is secure before attempting to hang. A doorway bar must be installed according to its manufacturer’s instructions and used within its weight limit.
How to Perform a Dead Hang Correctly
Knowing the benefits is one thing. Performing the movement correctly is what makes your training useful.
You don’t need to rush into long holds. Focus on a secure grip, controlled positioning, and a safe way to enter and exit the movement.
Step 1: Choose a Stable Pull-Up Bar
Find a pull-up bar that can safely support your body weight.
Before starting:
- Check that the bar is firmly installed.
- Make sure the surrounding floor is clear.
- Use a stable step or platform to reach the bar.
- Avoid slippery or wet hand surfaces.
- Check the equipment’s weight limit.
Don’t use a random door frame, loose pipe, or unstable furniture as a substitute for a proper exercise bar.
Step 2: Grip the Bar
Reach overhead and hold the bar with both hands.
For a standard overhand grip:
- Face your palms away from you.
- Position your hands approximately shoulder-width apart.
- Wrap your thumbs around the bar.
- Keep your fingers firmly closed.
- Avoid gripping so tightly that your forearms fatigue before you begin.
A shoulder-width grip is a practical starting point. You don’t need an extremely wide grip to perform this movement.
Step 3: Lift Your Feet Carefully
Use your step or platform to transfer your weight gradually onto your hands.
Once your feet leave the support, allow your arms to straighten.
Avoid jumping into the hanging position. Jumping can create unnecessary swinging and makes it harder to control your shoulders when you begin.
Step 4: Position Your Shoulders
For a beginner, start with a comfortable passive or slightly active hang.
Your shoulders should be in a position that feels controlled. Don’t force them downward, and don’t deliberately push into an uncomfortable end range.
If you are practising an active hang, gently engage the muscles around your shoulder blades without bending your elbows.
Step 5: Keep Your Body Controlled
Your legs should hang naturally beneath you.
Try to:
- Keep your torso relatively still.
- Avoid excessive swinging.
- Maintain a comfortable neck position.
- Keep your breathing steady.
- Avoid kicking your legs to extend your hold.
You don’t need to squeeze every muscle in your body. The goal is to maintain a controlled position, not turn a simple hang into a full-body competition.
Step 6: Breathe and Hold
Breathe normally throughout the movement.
Beginners sometimes hold their breath because they’re concentrating so hard on their grip. This can make the exercise feel more uncomfortable.
Start with a short hold and stop before your fingers begin slipping or your shoulders lose control.
Step 7: Return to the Floor Safely
This step is often overlooked.
Place your feet back onto the step or platform before releasing your hands.
Don’t simply drop from the bar, especially when you’re tired. A controlled exit is part of good technique.
How Long Should You Dead Hang?
This is probably the most common question beginners ask.
Should you hang for 10 seconds, 30 seconds, or a full minute?
The answer depends on your current strength, experience, grip endurance, and comfort.
There is no universally established dead hang time that every healthy adult must achieve. Numbers circulating online are general fitness benchmarks, not medical standards.
A better approach is to begin with a duration you can complete without pain or losing control.
Beginner Dead Hang Duration
Here is a practical starting guide:
| Experience | Suggested hold | Sets |
|---|---|---|
| Complete beginner | 5–10 seconds | 2–3 |
| Early progress | 10–15 seconds | 2–3 |
| Developing grip | 15–30 seconds | 2–3 |
| Intermediate | 30–45 seconds | 2–3 |
| More experienced | 45–60 seconds | 2–3 |
These are suggested training ranges, not official performance standards.
If you can only hold the bar for three seconds, that’s your starting point. You can also keep your feet partly supported to reduce the amount of body weight your hands must support.
Is a 30-Second Dead Hang Good?
Yes. A controlled 30-second hang can be a useful milestone, particularly if you’re a beginner.
It suggests that you can maintain your grip for a meaningful period, but it doesn’t tell the whole story about your fitness.
Your body weight, training history, hand size, grip technique, and shoulder comfort can all influence your time.
Instead of comparing yourself with someone online, compare your performance with your previous sessions.
Is a 60-Second Dead Hang Good?
A comfortable 60-second hold is a reasonable personal fitness goal for many people.
However, don’t force yourself to reach it quickly.
For general grip training, several shorter, high-quality holds may be more useful than one exhausting attempt that ends with your hands slipping.
The important thing is consistent, controlled progress.
Should You Dead Hang Every Day?
You don’t need to perform maximum-effort hangs every day.
Beginners can start with two or three non-consecutive training days per week. This gives your hands and forearms time to recover.
If you choose to practise more frequently, keep the sessions easy and avoid repeated attempts to failure.
Your grip muscles, tendons, and shoulder structures all need time to adapt to training.
Beginner-Friendly 4-Week Dead Hang Training Plan
If you’re starting from zero, follow this simple four-week progression.
The aim is to develop comfortable hanging tolerance and improve grip endurance without rushing.
Your 4-week hanging plan
Suggested progression · 3 sessions per week · Rest at least one day between sessions
Week 1 – Get comfortable
5–10 sec
2 sets per session
Focus on learning the grip and entering and exiting safely.
Week 2 – Build consistency
10–15 sec
2–3 sets per session
Work on breathing and keeping your body still.
Week 3 – Develop endurance
15–20 sec
3 sets per session
Gradually increase your hanging time while maintaining control.
Week 4 – Improve control
20–30 sec
2–3 sets per session
Try a gentle active hang if your shoulders tolerate it comfortably.
These are optional progression targets, not deadlines. Repeat a week or reduce the duration if you cannot maintain a comfortable position.
How to Track Your Progress
Don’t rely on memory. Record your sessions in your phone or a simple notebook.
| Session | Set 1 | Set 2 | Set 3 |
|---|---|---|---|
| Monday | 8 sec | 7 sec | 6 sec |
| Wednesday | 10 sec | 8 sec | 7 sec |
| Friday | 12 sec | 10 sec | 8 sec |
This is an example of how a beginner might record progress, not a guaranteed result.
Notice something important: your first set may improve faster than your later sets because fatigue builds across the session.
That’s normal.
A useful progression trick: Increase your total comfortable hanging time before trying to achieve one very long hold. For example, three 15-second holds give you 45 seconds of accumulated hanging time.
Different Dead Hang Variations to Try
Once you’ve become comfortable with a basic hang, you can experiment with other variations.
Each version changes the challenge slightly. Don’t jump into advanced variations just because they look impressive.
1. Assisted Dead Hang
Keep your feet on a stable platform while holding the bar. Use your legs to support part of your body weight.
Best for: Complete beginners who cannot yet support their full body weight.
2. Active Dead Hang
Keep your elbows straight and gently engage your shoulder blades to create a more controlled hanging position.
Best for: Developing shoulder control and preparing for pulling exercises.
3. Neutral-Grip Hang
Hold two parallel handles with your palms facing each other.
Best for: People who find this hand position more comfortable than an overhand grip.
4. Towel Hang
Hang from securely attached, purpose-designed training towels rather than directly gripping the bar.
Best for: More experienced trainees who want an additional grip challenge.
Note: This is harder than a standard hang. Use equipment designed for the purpose and avoid improvised setups.
5. Assisted Single-Arm Hang
Hold the bar with one hand while using your other hand to support yourself on a lower handle or stable support.
Best for: Experienced trainees developing one-sided grip endurance.
Note: Don’t attempt an unsupported one-arm hang until you have substantial grip and shoulder control.
Common Dead Hang Mistakes Beginners Should Avoid
Even though this movement has a simple setup, small mistakes can make it unnecessarily difficult or uncomfortable.
Here are some common problems to watch for.
1. Starting With Excessively Long Holds
Trying to hang for 60 seconds on your first day isn’t a smart way to build endurance.
Your hands and shoulders may not be prepared for that amount of loading.
Fix: Start with 5–10 seconds, or use an assisted hang. Build gradually.
2. Using an Uncomfortable Shoulder Position
Some people force their shoulders downward because they believe every hang must be active.
Others completely relax into a position they cannot comfortably control.
Fix: Find a comfortable shoulder position. Start with supported hanging if necessary, and learn active shoulder control gradually.
3. Allowing Your Grip to Slip
Your fingers should maintain a secure hold throughout the exercise.
If you notice your hands opening or sliding, don’t try to squeeze out another few seconds.
Fix: End the set while you still have control. Use a dry bar and dry hands.
4. Swinging Back and Forth
Excessive movement makes it harder to maintain a consistent hanging position.
It can also make it difficult to compare your performance between sessions.
Fix: Keep your legs relatively still and avoid kicking to stay on the bar.
5. Holding Your Breath
Some beginners concentrate so much on gripping that they forget to breathe.
Fix: Breathe naturally. If you cannot maintain normal breathing, shorten the hold.
6. Ignoring Pain
A little muscular effort in your forearms is expected. Sharp joint pain is not something to push through.
Fix: Stop if you experience shoulder, wrist, elbow, or hand pain. Don’t assume that discomfort means the exercise is working.
Who Should Avoid Dead Hangs or Seek Professional Advice First?
A dead hang isn’t suitable for everyone in every situation.
Because the exercise places your body weight through your hands, wrists, elbows, and shoulders, some people need extra caution.
Speak with a healthcare professional or physiotherapist before attempting it if you have:
- A recent shoulder, elbow, or wrist injury.
- A history of shoulder dislocations.
- Known shoulder instability or hypermobility.
- Recent upper-body surgery.
- Persistent pain during overhead movements.
- A medical condition that affects your ability to grip or support your body weight.
If you experience numbness, tingling, dizziness, sudden pain, or loss of control, stop immediately.
For severe or sudden shoulder symptoms, seek medical assessment rather than attempting to fix the problem with hanging exercises. The NHS also advises seeking help for sudden severe shoulder pain, inability to move the arm, or persistent pins and needles. The safest approach is to treat hanging as a strength exercise, not a treatment for an existing injury.
People with previous shoulder dislocations should understand the risks associated with instability. The AAOS guide to shoulder instability explains its causes and how it affects shoulder function.
How to Improve Your Dead Hang Time Faster
If your goal is to hang longer, don’t just repeat maximum-effort attempts every day.
A smarter approach is to improve the factors that limit your performance.
1. Train Your Grip Separately
Your hands need more than one type of stimulus.
Consider adding:
- Farmer’s carries.
- Light dumbbell holds.
- Controlled barbell holds.
- Resistance-based finger and wrist exercises.
These movements train grip in different ways.
2. Use Assisted Holds
If your grip gives out after five seconds, reduce the load rather than abandoning the exercise.
Keep your feet on a stable platform and gradually transfer more weight into your hands.
This makes the movement easier to practise consistently.
3. Improve Your Shoulder Control
Include simple shoulder blade movements in your warm-up.
For example:
- Shoulder circles.
- Gentle arm raises.
- Scapular retractions.
- Controlled scapular pull-ups, if appropriate.
These are preparation exercises, not a replacement for the dead hang itself.
4. Don’t Train to Complete Failure Every Session
If you repeatedly hang until your fingers suddenly release, your technique and safety can suffer.
Finish your sets while you can still control your body.
5. Keep a Training Log
Write down your best comfortable hold, total hanging time, and how your shoulders and hands felt.
For example:
- Week 1: 8-second best hold.
- Week 2: 12-second best hold.
- Week 3: 15-second best hold.
- Week 4: 20-second best hold.
These are illustrative milestones. Your actual progress may be faster or slower. Alongside consistent training, maintaining adequate nutrition is important for recovery. Learn more about your daily protein intake for muscle recovery and growth.
6. Be Patient With Your Grip
Your grip may improve at a different rate from your other upper-body movements.
Don’t compare your progress with climbers, gymnasts, or people who have trained for years.
A gradual increase in comfortable hanging time is meaningful progress.
Does the Dead Hang Really Improve Longevity?
You’ve probably seen social media posts claiming that the amount of time you can hang from a bar predicts how long you’ll live.
There’s an important distinction here.
Research has found associations between handgrip strength and several health outcomes. Grip strength is often used as one indicator of physical function.
However, this does not mean that holding a pull-up bar for a certain number of seconds guarantees a longer life.
The American Council on Exercise discusses the relationship between grip strength and health, while also emphasizing that dead hangs are only one possible way to train grip. Farmer’s carries and pulling exercises can also help. The Truth Behind the Trends
A useful takeaway:
- Improve your overall strength.
- Include different types of resistance training.
- Maintain regular physical activity.
- Don’t use one exercise as a complete measure of your health.
A 60-second hang is a fitness milestone, not a medical longevity test.
Best Exercises to Combine With Dead Hangs
If you want more than grip endurance, combine hanging with other upper-body movements.
Here is a simple routine for beginners:
| Exercise | Sets | Reps / Duration |
|---|---|---|
| Assisted dead hang | 2 | 10–15 sec |
| Scapular pull-ups | 2 | 6–8 |
| Incline push-ups | 3 | 8–12 |
| Backpack rows | 3 | 10–12 |
| Plank | 2 | 20–30 sec |
Perform this routine two or three times weekly, with recovery between sessions.
Adjust the exercises to your ability. If you cannot perform scapular pull-ups comfortably, practise supported shoulder blade movements instead.
For general strength development, the American College of Sports Medicine recommends challenging major muscle groups through structured resistance exercise rather than relying on one movement alone. If you want a more structured weekly routine, follow this complete home workout plan for beginners to develop strength across your entire body.
Frequently Asked Questions About Dead Hang Exercise
1. What is the dead hang exercise good for?
The dead hang is primarily useful for developing grip endurance and practising controlled overhead hanging. It can also help prepare beginners for pull-ups and other upper-body exercises.
2. How long should a beginner dead hang?
A beginner can start with 5–10 seconds per set and gradually increase the duration. Two or three controlled sets are a reasonable starting point. If necessary, keep your feet partly supported.
3. Is a 30-second dead hang good?
Yes. A comfortable 30-second hang is a useful milestone for many beginners. However, performance varies according to body weight, grip strength, experience, and shoulder comfort.
4. Can dead hangs help with pull-ups?
Yes. Dead hangs help develop grip endurance and familiarity with supporting your body weight. However, you’ll also need pulling strength, which you can develop through assisted pull-ups, rows, and lat pulldowns.
5. Do dead hangs build muscle?
They mainly train grip endurance and the muscles involved in maintaining a hanging position. They are not a replacement for progressive resistance exercises if your primary goal is building muscle mass.
6. Are passive or active dead hangs better?
Both have different purposes. Passive hangs introduce you to the hanging position, while active hangs require more shoulder blade control. Beginners can start with supported or comfortable passive hangs before progressing.
7. Can I do dead hangs every day?
You don’t need to. Two or three sessions per week are a reasonable starting point. Avoid repeated maximum-effort attempts and allow your hands and shoulders to recover.
8. Do dead hangs decompress your spine?
Some people experience a temporary stretching sensation while hanging, but there isn’t sufficient evidence to claim that ordinary dead hangs permanently decompress the spine, correct spinal problems, or increase height.
9. Why do my hands hurt during dead hangs?
Your hands may become tired because your fingers and forearms are supporting your body weight. However, sharp pain, numbness, tingling, or persistent discomfort should not be ignored. Stop and seek professional advice if these symptoms occur.
10. Can overweight beginners perform dead hangs?
Some can, but the exercise may be more challenging because the hands and shoulders must support a greater body weight. Start with a supported hang and gradually increase the load only if it feels comfortable and controlled.
Conclusion: Start Small and Build Your Grip Strength
The dead hang exercise proves that you don’t always need complicated workouts to improve an important aspect of your fitness.
A simple pull-up bar can help you develop grip endurance, become more comfortable with overhead positions, and prepare for challenging movements like pull-ups. Start with short holds. Learn the correct technique. Give your body enough recovery time, and increase your hanging duration only when you’re ready.
Don’t worry if you can only manage five seconds today. Your goal isn’t to compete with someone who has been training for years.
Focus on your own progress. And remember, dead hangs work best as part of a balanced fitness routine that includes pulling exercises, resistance training, and proper recovery. Start with your first controlled hang today, track your progress, and build from there.